The NC Protect Data Connector for Microsoft Sentinel enables customers to easily ingest user activity and logs collected in NC Protect and push them into Microsoft Sentinel to analyze the data at cloud scale using pre-built workbooks, as well as trigger alerts. NC Protect’s Data Connector for Microsoft Sentinel is deployed to a Sentinel-enabled Log Analytics Workspace (LAW).
For more information or to download the NC Protect Data Connector from the Azure Marketplace, refer to: https://azuremarketplace.microsoft.com/en/marketplace/apps/nucleuscyber.nc-protect-azure-sentinel-data-connector?tab=Overview
Deployment Instructions
To deploy and use the NC Protect Data Connector for Microsoft Sentinel, follow the steps below.
Pre-requisites
-
- The NC Protect Data Connector for Microsoft Sentinel is free to NC Protect users. A valid instance of NC Protect for Microsoft 365 is required in order to use the connector.
- Create and elevate an Azure Log Analytics Workspace as a Sentinel Workspace. For more information, see Quickstart: Onboard in Microsoft Sentinel | Microsoft Learn
NOTE: After successfully creating the LAW from the Microsoft Sentinel page, verify that the LAW created has been added to Microsoft Sentinel by going back to the Microsoft Sentinel menu and clicking Add. - Ensure NC Protect for M365 is installed. Then configure the SIEM options to point to this LAW (refer to the NC Protect for M365 installation guide).
Deploy the NC Protect Data Connector for Microsoft Sentinel
- Go to the Azure Marketplace NC Protect Data Connector offer, using this link:
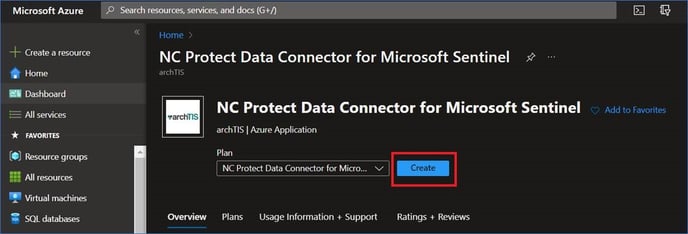
https://azuremarketplace.microsoft.com/en/marketplace/apps/nucleuscyber.nc-protect-azure-sentinel-data-connector?tab=Overview - Click Get it Now and after logging in with the appropriate credentials (see the Quickstart link above). Click on Create:
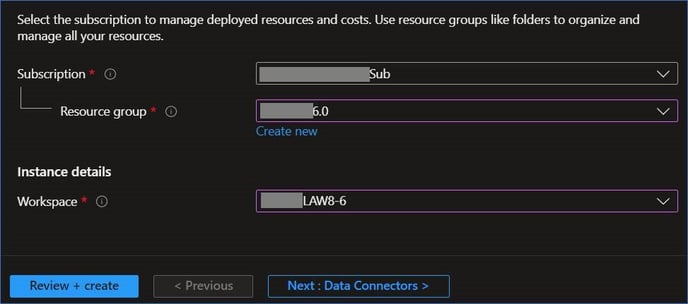
- Select the Subscription, Resource Group and Sentinel-enabled LAW as defined in Pre-requisite 1 above.
- Complete the deployment by clicking Next (Data Connectors -> Workbooks, both of which are contained in the NC Protect Data Connector pack).
- Click on Review + Create to proceed with the Validation.
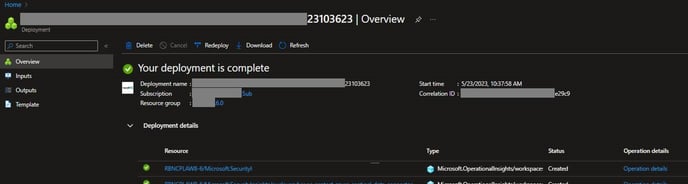
- Once Validation is passed, review the Terms of Use, and your subscription details then click Create. This proceeds with the deployment of the various resources:
- From the Microsoft Sentinel page, select the Workspace, Configuration > Data Connectors and search for “NC Protect”.
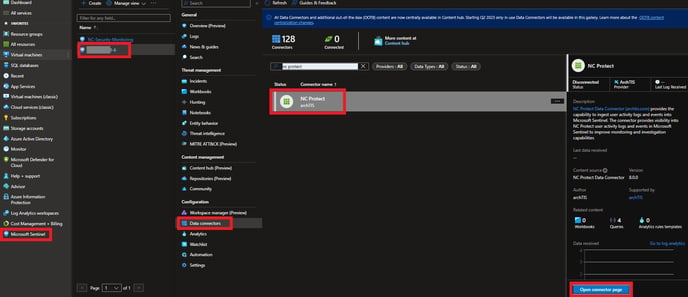
- Click on the Open Connector page, to open the NC Protect Data Connector for Sentinel page. This highlights the next steps to perform, such as configuring NC Protect with the details required to populate the Logs.
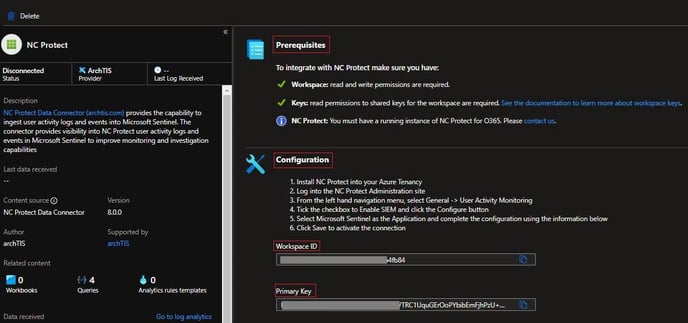
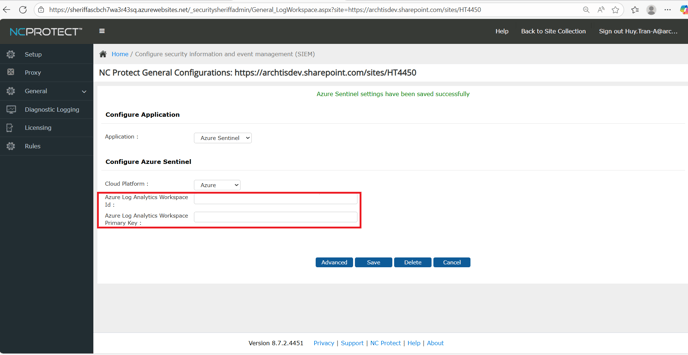
Take note of the Workspace ID and Primary Key values. These 2 values will be used when configuring NC Protect for M365 for Microsoft Sentinel. - Navigate to the NC Protect Administration page and select General > User Activity Monitoring and Enable security information event management (SIEM). Click Configure.
- Enter the Workspace ID and Primary Key copied in step 6 and paste it into the corresponding fields on the NCP Administration page.
To create the tables that capture the user event logs inside of the SIEM workbook, it will require the Admin/End User to create activity inside of the Proxied assets e.g Log in/Log out, upload files, download files, delete files. This will then create the tables where the Administrator can monitor user activity logs within the NC Protect Workbook on Sentinel.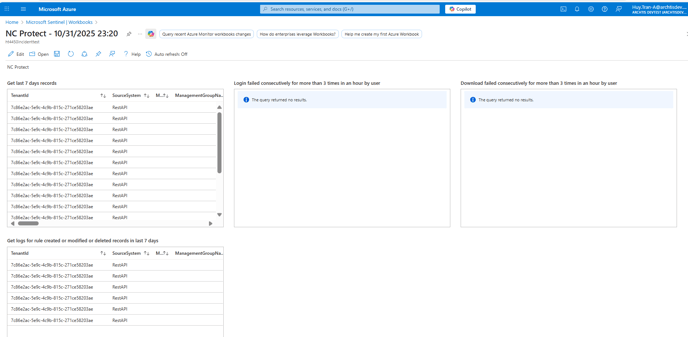

Refer to the NC Protect for M365 Installation Guide for more information.
Validation Checks of Pre-requisites
- Inside the Azure Portal navigate to Microsoft Sentinel - The Name of the onboarded Log Analytics Workspace - Analytics.
Expected Result - A Near Real Time (NRT) rule will be present called DownloadRateHighRule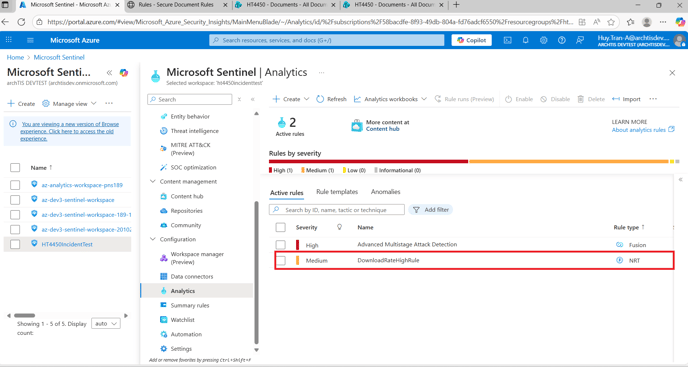
- Inside the Azure Portal navigate to Microsoft Sentinel - The Name of the onboarded Log Analytics Workspace - Watchlist.
Expected Result - A watchlist item will be present called wNCPFileDownloadMonitoring
The watch list item allows the Administrator to configure what the parameters of the action event that requires monitoring - Administrators can configure the number threshold of the occurring event and the Time Window in minutes of that threshold, and also select the level of Incident Severity. This will then create an incident based off the time, threshold and then log the Incident based off the Watchlist Severity.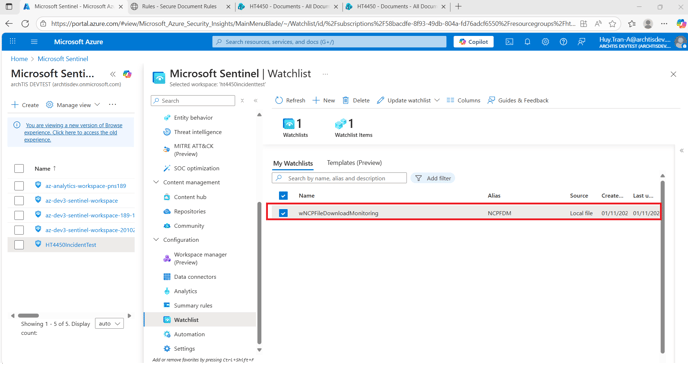
- Inside the Azure Portal navigate to Microsoft Sentinel - The Name of the onboarded Log Analytics Workspace - Automation.
Expected Result - 4 automation rules will be present
These 4 automation rules allow the Administrator to define the severity level of the incident configure - after activating the NRT in step Validation Checks of Pre-requisites step 1. The automation rules will all have a status of Enabled.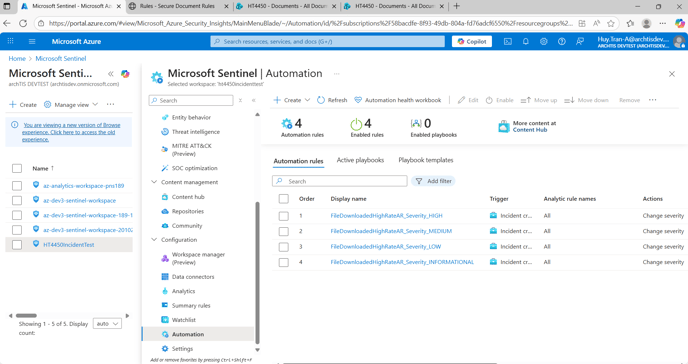
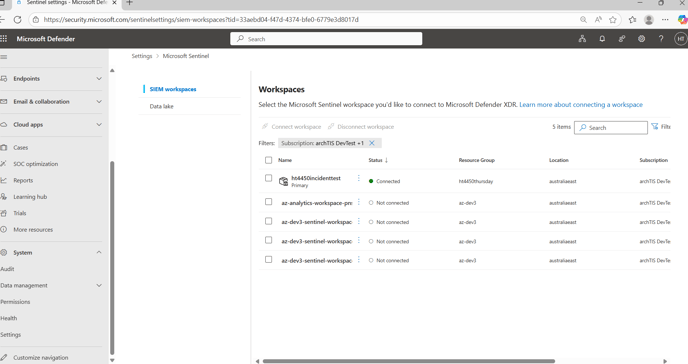
Microsoft is slowly migrating the Azure Sentinel functionalities across to its other product, Microsoft Defender. Therefore, the next steps will ensure that the validation checks are also repeated inside of Microsoft Defender. -
Log into Microsoft Defender (https://security.microsoft.com/).
- Navigate to the SIEM workspaces by clicking System - Settings - Microsoft Sentinel.
- Inside the Microsoft Defender Portal click the drop-down Microsoft Sentinel and select Analytics under the Configuration sub-menu.
Expected Result - A Near Real Time (NRT) rule will be present called DownloadRateHighRule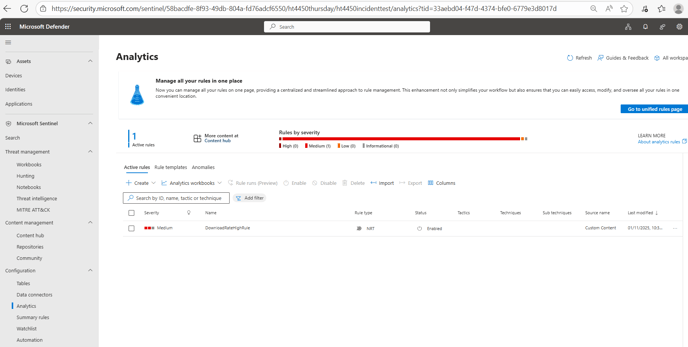
- Inside the Microsoft Defender Portal click the drop-down Microsoft Sentinel and select Watchlist.
Expected Result - A watchlist item will be present called wNCPFileDownloadMonitoring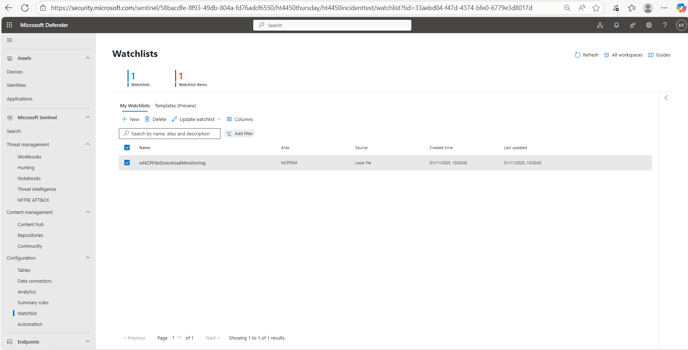
- Inside the Microsoft Defender Portal click the drop-down Microsoft Sentinel and select Automation.
Expected Result -Expected Result - 4 automation rules will be present with the status of Enabled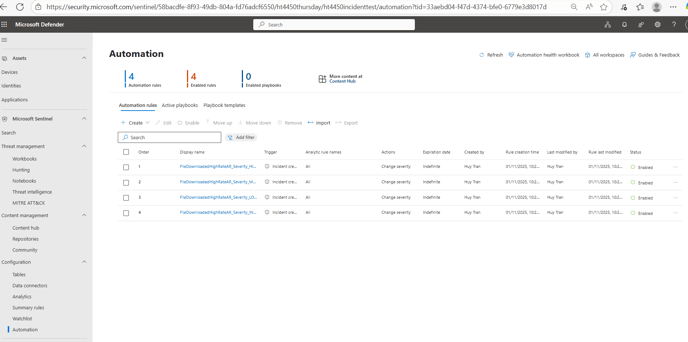
Validation Checks of Pre-requisites
The following steps will demonstrate the functionality of configuring the Watchlist parameters to the business needs and then displaying the Incident inside of Azure and the Defender.
-
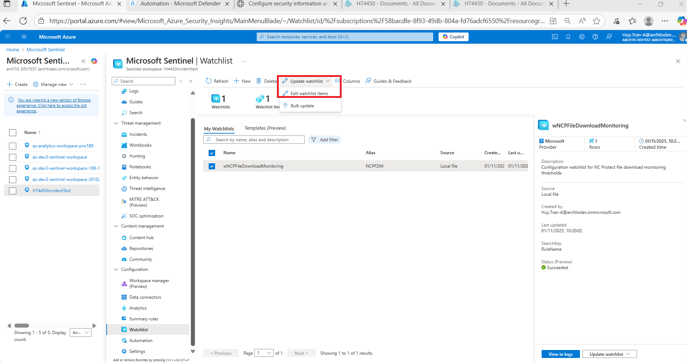
Inside the Azure Portal navigate to Microsoft Sentinel - The Name of the onboarded Log Analytics Workspace - Watchlist.
-
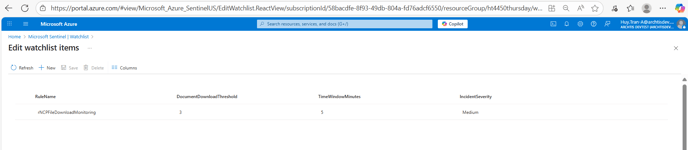
Select the Watchlist ‘wNCPFileDownloadMonitoring’, click Update Watchlist - and Edit Watchlist items from the dropdown.
- For the purpose of demonstration and testing - I have updated the DocumentDownloadThreshold to 3 and TimeWindowMinutes to 5 with an IncidentSeverity of Medium. What this means is that if an end user downloads more than 3 documents within 5 minutes - NC Protect will then log a Security Incident where the Administrator will be able to read a report from.
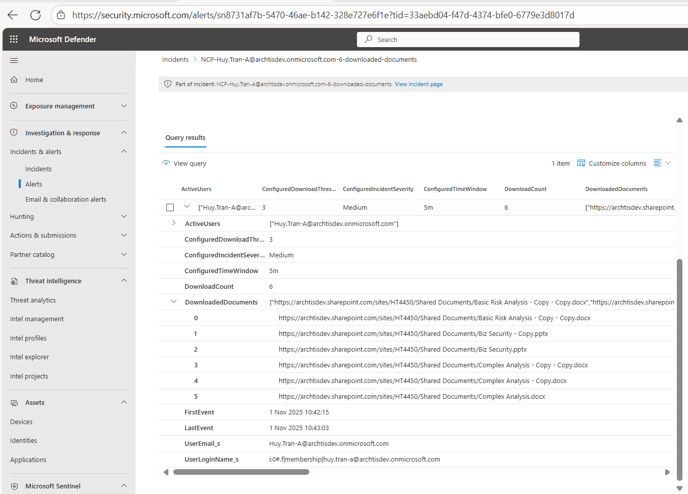
- After downloading the documents - a security incident will be triggered and logged.
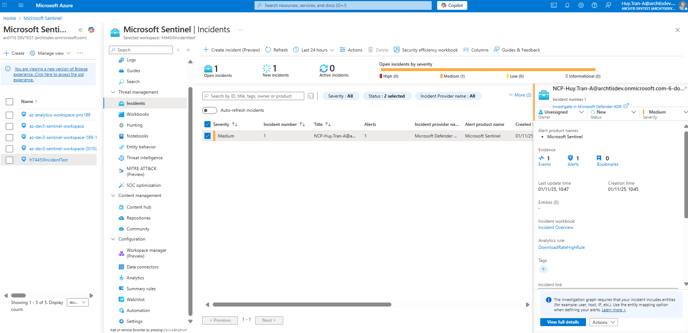

- The administrator can then click into the incident and view the query, which will then show all the documents downloaded within the incident.